Copy and Paste, the Angel with the trail, as a new image.
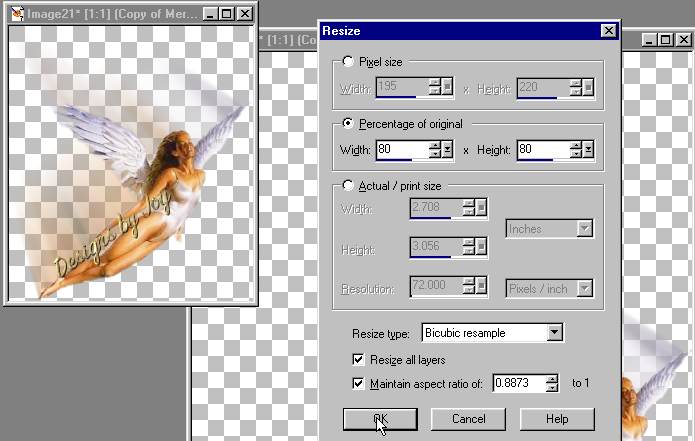
Resize this angel to 80% as shown.
Drag this new Angel layer from the layer palette to the large
image.
(So you get an idea, this is what it will look like.)

Undo the resize to the separate Angel.
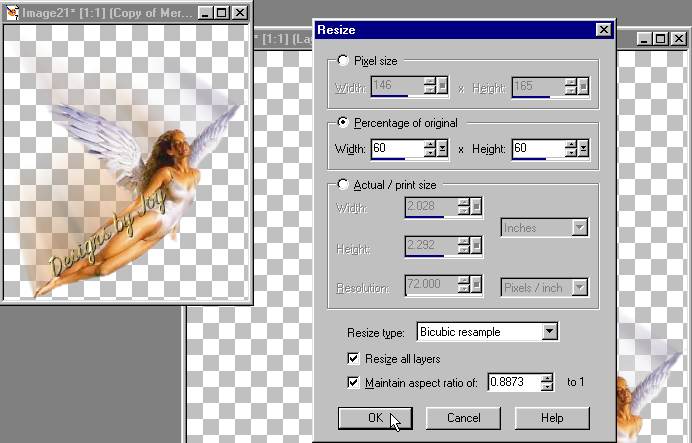
Now resize to 60% and repeat the steps as above.
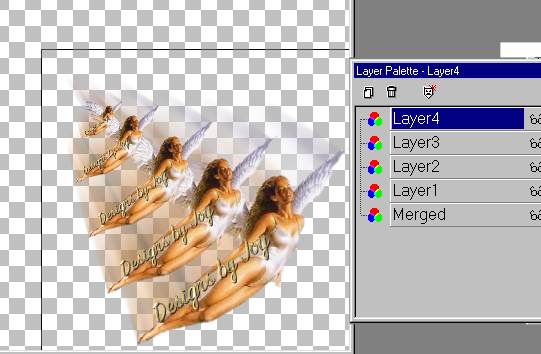
Repeat until you have 5 images.
Keep in mind, you have the X'ed plain Angel here too.
Crop the extra space away.
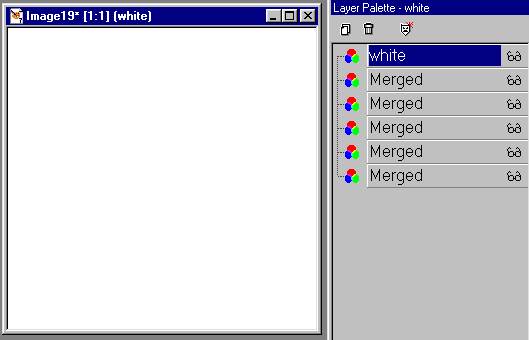
Add a layer. Fill with white. Duplicate this layer 6 times
(or as many as Angels that you have plus one)
Ok....here we go merging layers again! One step at a time.
You can do it!
X out all the layers except the plain Angel layer and a white layer.
Merge these two layers. If this layer is not at the bottom...drag it there. Red
X this layer.
Now Un-X the full Angel with the motion trail and a white layer. Merge these
two. Red X this layer.
Now un-X the 80% angel and a white layer. Merge these two. Red X this
layer.
Now un-X the 60% angel and a white layer. Merge these two. Red X this
layer.
Now un-X the 40% angel and a white layer. Merge these two. Red X this
layer.
Now un-X the 20% angel and a white layer. Merge these two. Red X this
layer.
Now you should have a plain white layer by it's self.
This is the order you want the angels. From plain to smallest, then the blank
white layer.
Save as a psp file. Open in Animation Shop. Open the PSP file.
If the frames go from largest to smallest, click on the first frame hold the
shift down,
click on the last frame to select them all....(all should be blue outlined)
Shift R to reverse the order of the frames.
Set the time for all but the last from at 25 (click on each one, right click,
frame properties)
Set the last frame to 500. This should be the plain Angel. File/save as a gif.
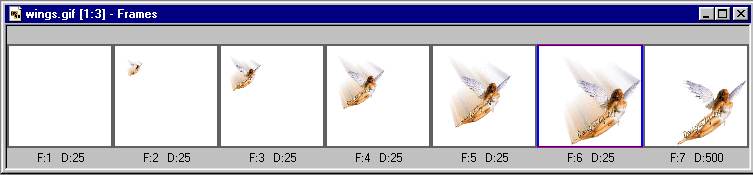
This is what you should end up with.
